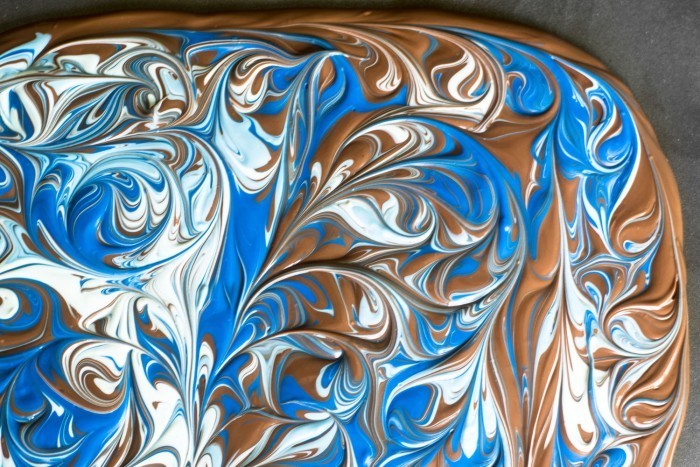
Milk Chocolate Marbleized Bark
Recipe by
The View From the Great Island
Visit website
Milk Chocolate Marbleized Bark is beautiful and so easy to make --- let your inner Picasso go wild!
Ingredients
- 12 ounce bag of milk chocolate chips
- white candy melts
- blue candy melts
- green candy melts
Method
- Basically you want your chocolate and your colored candy melts to all be melted at the same time. I usually start with the candy melts.
- Put about 1/4 cup of each color candy melt in a small microwave safe glass. Microwave for 30 seconds, then stir. The heat of the glass will help melt the candy. Don't over heat, use just enough microwave time to get the candy to a fluid state. You can do them one at a time or put all three glasses in the microwave at once.
- Put the milk chocolate chips in a microwave safe bowl and microwave for one minute. Remove and stir. If necessary, heat the chocolate for another 15 -30 seconds, just until warm enough to melt all the lumps.
- When everything is melted and ready, pour the regular chocolate out onto a baking sheet. The sheet can be lined with parchment paper, a silicone mat, or nothing, it works all ways. Spread the chocolate out with a small spatula into a rectangle approximately 8x11, or roughly the size of a piece of paper. The larger your rectangle, the thinner your bark will be.
- Now make blobs or streaks of the colored candy melts on top. Use a small spoon and arrange the blogs all over the surface of the chocolate.
- Take a skewer or chopstick and begin to make swirls through all the layers, moving all over the chocolate, around in spirals, and up and then in long movements across the slab and up and down.
- Put the whole tray in the refrigerator to set up. When hard, cut into pieces with a large sharp knife.
- Store at cool room temperature, or in the fridge.
View the recipe instructions at The View From the Great Island
